Scraping Data with AgentQL's REST API
AgentQL’s REST API enables powerful, flexible data retrieval from webpages in a structured format, ready for seamless integration into your workflow.
Overview
This guide shows you how to use the REST API to scrape data from a webpage, customize parameters for enhanced scraping capabilities, and retrieve structured data in JSON format with AgentQL queries. (You can also query data from raw HTML.)
Defining the REST API request structure
The following fields outline the high-level structure of a data scraping request:
url: The URL of the webpage you want to retrieve data fromhtml: Alternative tourl, which you can use to query data from an HTML file.query: An AgentQL query that defines the data to extract and the format for the retrieved output.params: (Optional) Additional settings for enhanced data retrieval, such as enabling screenshots or scrolling. See the API Reference for more details about params.
Constructing the API request
To perform a basic data scraping request, start by defining the url of the desired webpage and the query to specify the data you want to retrieve in the request body.
- Example REST API Request
Below is an example request body structure:
{
  "url": "https://scrapeme.live/?s=fish&post_type=product",
  "query": "{ products[] { product_name product_price(integer) } }"
}- Setting Request Headers
Before making the API request, include the necessary headers for authentication and content type. These headers authorize the request and specify the data format to send.
-
X-API-Key: this header should have your AgentQL API key for authentication. -
Content-Type: set it toapplication/jsonto indicate that the request body is in JSON format, allowing the server to interpret the data correctly.
- Making the API Request
Using your preferred HTTP client (like curl, Postman, or an HTTP library in Python or your preferred language), you can make a POST request to the AgentQL REST API endpoint.
curl -X POST "https://api.agentql.com/v1/query-data" \
  -H "X-API-Key: $AGENTQL_API_KEY" \
  -H "Content-Type: application/json" \
  -d '{
    "url": "https://scrapeme.live/?s=fish&post_type=product",
    "query": "{ products[] { product_name product_price(integer) } }"
}'Make sure to replace $AGENTQL_API_KEY with your actual API key.
- Reviewing the API Response
If the request is successful, the API returns a JSON response with the extracted data.
Example Response
{
  "data": {
    "products": [
      {
        "product_name": "Qwilfish",
        "product_price": 77
      },
      {
        "product_name": "Huntail",
        "product_price": 52
      },
      ...
    ]
  },
  "metadata": {
    "request_id": "ecab9d2c-0212-4b70-a5bc-0c821fb30ae3"
  }
}You can read more about the response structure and metadata fields in the API Reference.
Debugging with Screenshots
If you are not receiving the expected data, you can use screenshots to validate that the page is in expected state by setting the is_screenshot_enabled parameter to true in the request body.
curl -X POST "https://api.agentql.com/v1/query-data" \
  -H "X-API-Key: $AGENTQL_API_KEY" \
  -H "Content-Type: application/json" \
  -d '{
    "url": "https://scrapeme.live/?s=fish&post_type=product",
    "query": "{ products[] { product_name product_price(integer) } }",
    "params": {
        "is_screenshot_enabled": true
    }
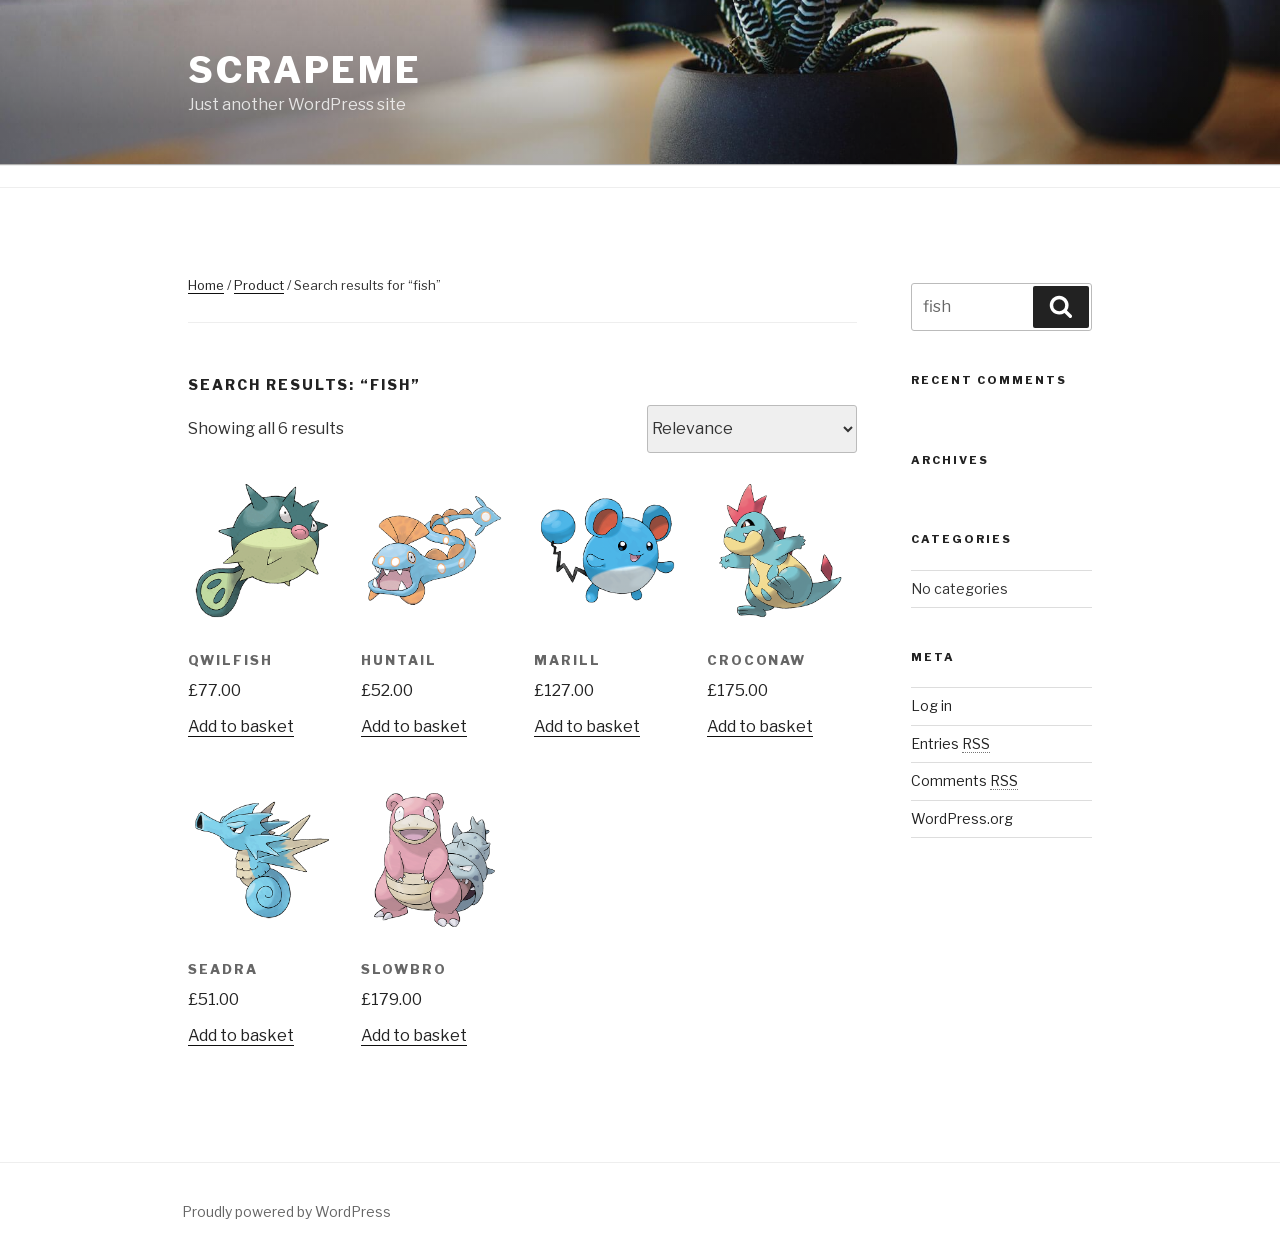
}'With screenshots enabled, the API will return a Base64 encoded string in the screenshot field of the response. This will allow you to see the page content that was scraped.
{
  "data": {
    "products": [
      {
        "product_name": "Qwilfish",
        "product_price": 77
      },
      {
        "product_name": "Huntail",
        "product_price": 52
      },
      ...
    ]
  },
  "metadata": {
    "request_id": "ecab9d2c-0212-4b70-a5bc-0c821fb30ae3",
    "screenshot": "iVBORw0KGgoAAAANSUhEUgAABQAAAALQCAIAAABAH0o..."
  }
}You can convert the Base64 string returned in the screenshot field to an image and view it using free online tools like Base64.guru.
Here's the screenshot returned in the above response:

To get more familiar with the AgentQL's REST API and other params options, check out the API Reference.